Avraham's Tent
In this week's Torah portion, Parshas Veyeira, we learn about Avraham & Sara's incredible hachnosos orchim, being kind and hospitable to guests. His tent had four openings so that he could see when people were travelling from any direction, so he could offer assistance to them.
Supplies:
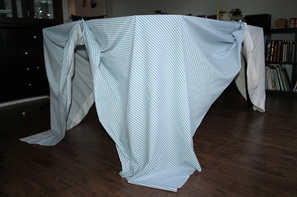
Drape a sheet over your table. Clip the middle of each side up to create an opening. Then enjoy hours of pretend play using the structure as a tent. My children enjoyed baking goods in their play kitchen and bringing them to the tent, where they proceeded to offer the goods to the many (pretend) people who passed by. They even helped them say the brachos (blessings) on the food.
Tent Diorama
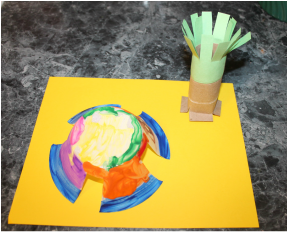
We also made the scene from this week's parsha in 3-D.
Supplies:
In this week's Torah portion, Parshas Veyeira, we learn about Avraham & Sara's incredible hachnosos orchim, being kind and hospitable to guests. His tent had four openings so that he could see when people were travelling from any direction, so he could offer assistance to them.
Supplies:
- A square or rectangular table
- 1 large table cloth or flat sheet or 2 medium ones
- 4 clips (can be office foldback clips or food storage clips, etc)
Drape a sheet over your table. Clip the middle of each side up to create an opening. Then enjoy hours of pretend play using the structure as a tent. My children enjoyed baking goods in their play kitchen and bringing them to the tent, where they proceeded to offer the goods to the many (pretend) people who passed by. They even helped them say the brachos (blessings) on the food.
Tent Diorama
We also made the scene from this week's parsha in 3-D.
Supplies:
- 1 sheet of cardstock paper
- 1 paper or styrofoam bowl
- paint or markers
- empty toilet paper roll
- green construction paper
- glue
- scissors
- sand or glitter
A Colourful Tree
We learned that 3 angels who were in the form of people were sitting under a tree when Avraham approached them offering food and drink. This project is perfect for the parsha, and has great timing as it's a wonderful opportunity for children to learn about the fall season and the change of colours on the leaves.
Supplies:
- 1 sheet of cardstock paper
- red, orange, yellow, green paint
- some twigs or branches
- green tissue paper, streamer, or construction paper
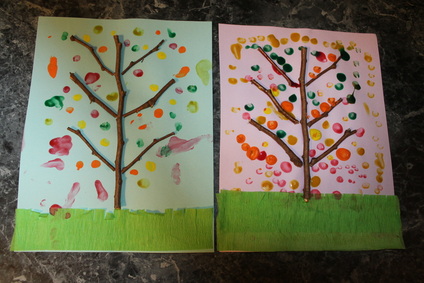
Break or cut the twigs into one long piece to be the trunk and 6 smaller pieces to be the branches. Glue them on and let dry for several hours. Glue a strip of green paper along the bottom and you can cut slits to create a fringe. Using your fingers, make dots all around the branches in a variety of colours. Both my 2 and 4 year old children equally enjoyed this project. We talked about why leaves change colours and what happens to them in each of the seasons. We had a great time walking throughout our neighbourhood finding trees that had all the different colours of leaves that we painted


 RSS Feed
